Welcome! I’m Janet Kierstead, and you’re on the first page of the section in this website I’ve designed for parents, grandparents, caregivers — anyone at home helping a child learn to read/write and develop higher-level thinking skills. These strategies can either supplement virtual learning — or be at the heart of a more comprehensive homeschooling program.
(If you’re not living with the child you’d like to help, see Long Distance Learning. It shows you how to use the strategies on this page with talk and text on your cell phone.)
The strategies on this first page, are primarily for children still working on basic literacy skills. So if the child you’re working with both reads and writes fluently, you might want to skip this page and follow the link to projects on the following page. But if your child can read, but has difficulty expressing their thoughts in writing (or vice versa), Key Words can help them, no matter how old they are. Just start them at Step 3 .
Clarifying some misconceptions
Before we look at strategies, let’s clarify a few things about learning at home. First, homeschooling, or supplementing virtual learning, is not “public school at home.” And you need not spend the same time at home on learning activities as in school. For you can accomplish much more at home in much less time. See more about these two issues here.
Further, you do not need to buy curriculum. One of the huge advantages at home is that you can personalize learning for your child. This can be organized using the simple strategies you’re learning here. So instead of planning out a series of topics to “cover,” you will be basing skill development on your child’s interests. So your curriculum will unfold as you go.
It’s easy to work in this natural way with your child, and it’s fun for them. For you’re using their curiosity and the powerful ways a child spontaneously learns — as described in A Natural Approach and as you will discover here.
We look now at the basic strategy we use for developing fluency in both reading and writing.
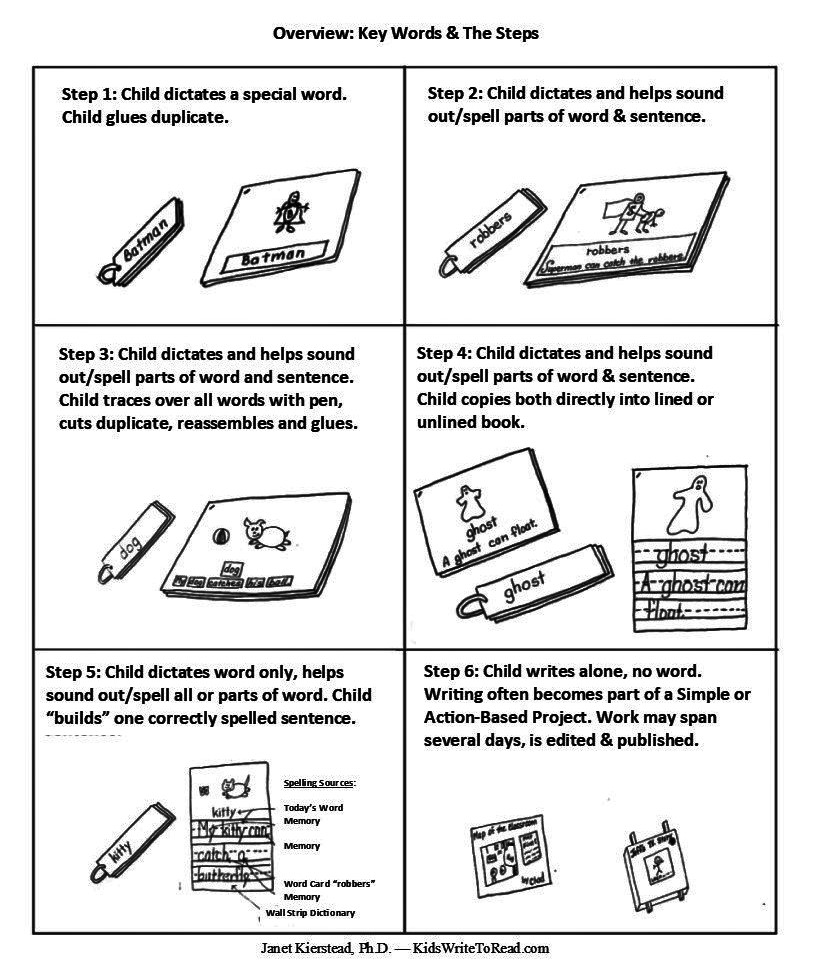
Key Words & The Steps
Key Words are the “captions for a child’s mind pictures.” With them, we show the child how the words they say look, when written down for them. The Steps are 6 follow-up activities for Key Words. They take a child from where they are and gradually help them advance toward independent writing/reading — and then into projects.
A session with Key Words takes only about 15 – 20 minutes of your time. Then the child leaves you to work on the follow-up activity for the Step they’re on. Once finished with their Step activity, they return to you to share what they’ve done.
Even spending such a brief time, it’s likely your child will not only keep up with what they might learn with in-person schooling, but it’s likely they’ll make exceptionally good progress.
Directions for Working with Key Words
 At the beginning of each session with Key Words, you sit with a child and prompt them to talk about something they’re very interested in. Perhaps they tell you about the family pet, a favorite food, or something about a holiday they’re excited about.
Take plenty of time with this discussion. This is your chance to expand the child’s vocabulary, sentence structure, and listening skills. Ask them questions, prompt them to describe the item or event they’re thinking about — how and why it happened, how they felt, etc. Remember, there are two oral language skills — listening and speaking — and their strength can affect reading and writing.
Help the child decide what one or two (and occasionally three) words capture what they’ve been telling you about the one thing that’s most on their mind that day.
Say they’ve been telling you how much they like ice cream. Using a wide-tipped marking pen, write ice cream on heavy card stock, cut to approximately 3″ X 7.” (A recipe card will do, but heavier quality is better, so the ink doesn’t bleed through.)
Say the names and/or sounds 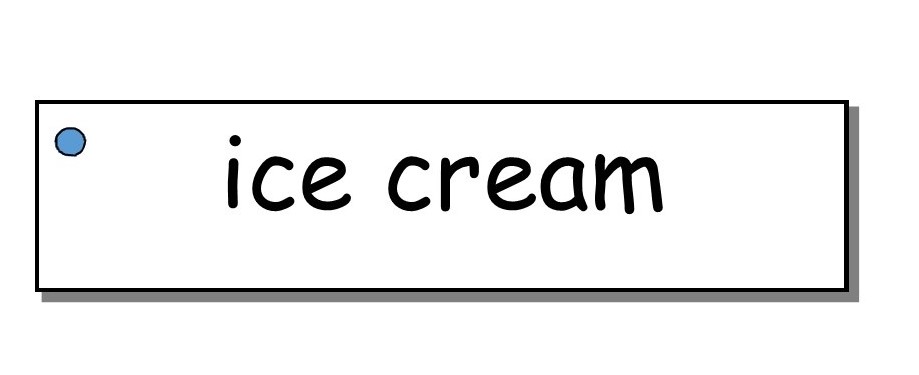 of each letter as you write the word(s). Once you’ve finished, have the child trace over the letters with the index finger of their writing hand.
With this, they’re immediately beginning to absorb phonics (the sound/letter relationship) and practice letter formation.
Have them place today’s Key Word on their metal Word Ring. (A shower curtain will do if they can handle opening/closing it.)
Make a duplicate of their word for them — this time on regular typing paper, or on newsprint, if you have it. They will then leave you to finish their work. Their task is to glue the duplicate onto a blank page in their Writing Book and draw a picture about it. When finished, they will come back and show it to you. And you simply give them some positive feedback.
(If the child cannot yet draw, direct them to do a few other things with their word. For ideas, see item#5, under the section “What To Keep In Mind…” on the page, Key Words With Preschoolers.)
If they’re old enough to draw, you will have made them a 5-page Writing Book. Once that’s filled up, they will “read” it from memory later to themselves and to others. These books replace the usual pre-primers/basal readers that are part of a traditional reading program. In those, professional writers work hard to use words common to young children as they write those books. But here, with the child writing their own primer, the vocabulary and stories are a perfect match for your child to practice with, so they’re actually better than one you could buy for them.
Only Words the child immediately recognizes stay on the ring
From now on, at the beginning of each session with Key Words, the child goes through the words on their Word Ring and says what they are. It’s extremely important that a word they don’t immediately recognize comes off the ring. (Put it aside and toss it later.)
A child will virtually always remember an actual Key Word the following day and thereafter. But if not, it must come off their ring.
This is essential, for the power of Key Words comes from the fact that the child is very interested in the “mind pictures” these words represent — so interested that they don’t forget the word. Interest is a powerful magnet for skill development, so that’s why we’re so careful to be sure the child is actually interested in the word you write for them.
Occasionally an adult will think they’re helping a child, by giving them hints or helping them “sound out” the word. Sounding out words will be a good tactic for later. But keeping words on their word ring they don’t immediately recognize will undermine this approach. For this will confuse the child, so that they may lose confidence with print. So if this happens, try to be sure they’re really interested in what they’re talking about for each day’s new word. It usually only happened with one or two children at the beginning of each year I was doing this in my classroom. So if it happens more than once, see what to do here.
More About The Steps
Using the steps to guide skill development
Soon after the introduction to Key Words, watching you write their Key Word for them and gluing it into their book is not enough of a challenge. So that’s where The Steps come in.
The 6 Steps become increasingly complex over time. So they will guide the child to writing independently– and at the same time, the skills involve transfer to reading. So your child will learn to both read and write in about the same time it takes to learn to read, in a traditional reading program. And the Steps make the process fail-safe. For you have this criteria you can use to decide when a child is ready to move to the next Step.
Here’s the progression of the 6 Steps:
Step 1. The directions I just gave above were for a child at Step 1. There, they were beginning to work on phonics and letter formation. With each subsequent Step, they’ll be adding new skills.
Step 2. Here, we have the child dictate a sentence to go with their Key Word. (The sentence goes on the back of their word card.) The duplicate has their word, with the sentence written under the it. The follow-up activity at Step 2 is to glue that duplicate under the drawing, so the child’s work is no different. But while watching you write their sentence, they’re learning that individual words are written with spaces between them, as well as how capital letters and punctuation are used.
Note for younger children: Many children are ready for Key Words at around 3 years old — before they can draw. So recall that the very young child might be doing something else with their word, as described in Key Words With Preschoolers. But it may just be their motor skills holding them back. So they probably will be able to slowly work their way through the Steps, just as an older child would. They just may not go at the same speed.
this criteria you can use to decide when a child is ready to move to the next Step. That criteria is your guide for making the process fail-safe.
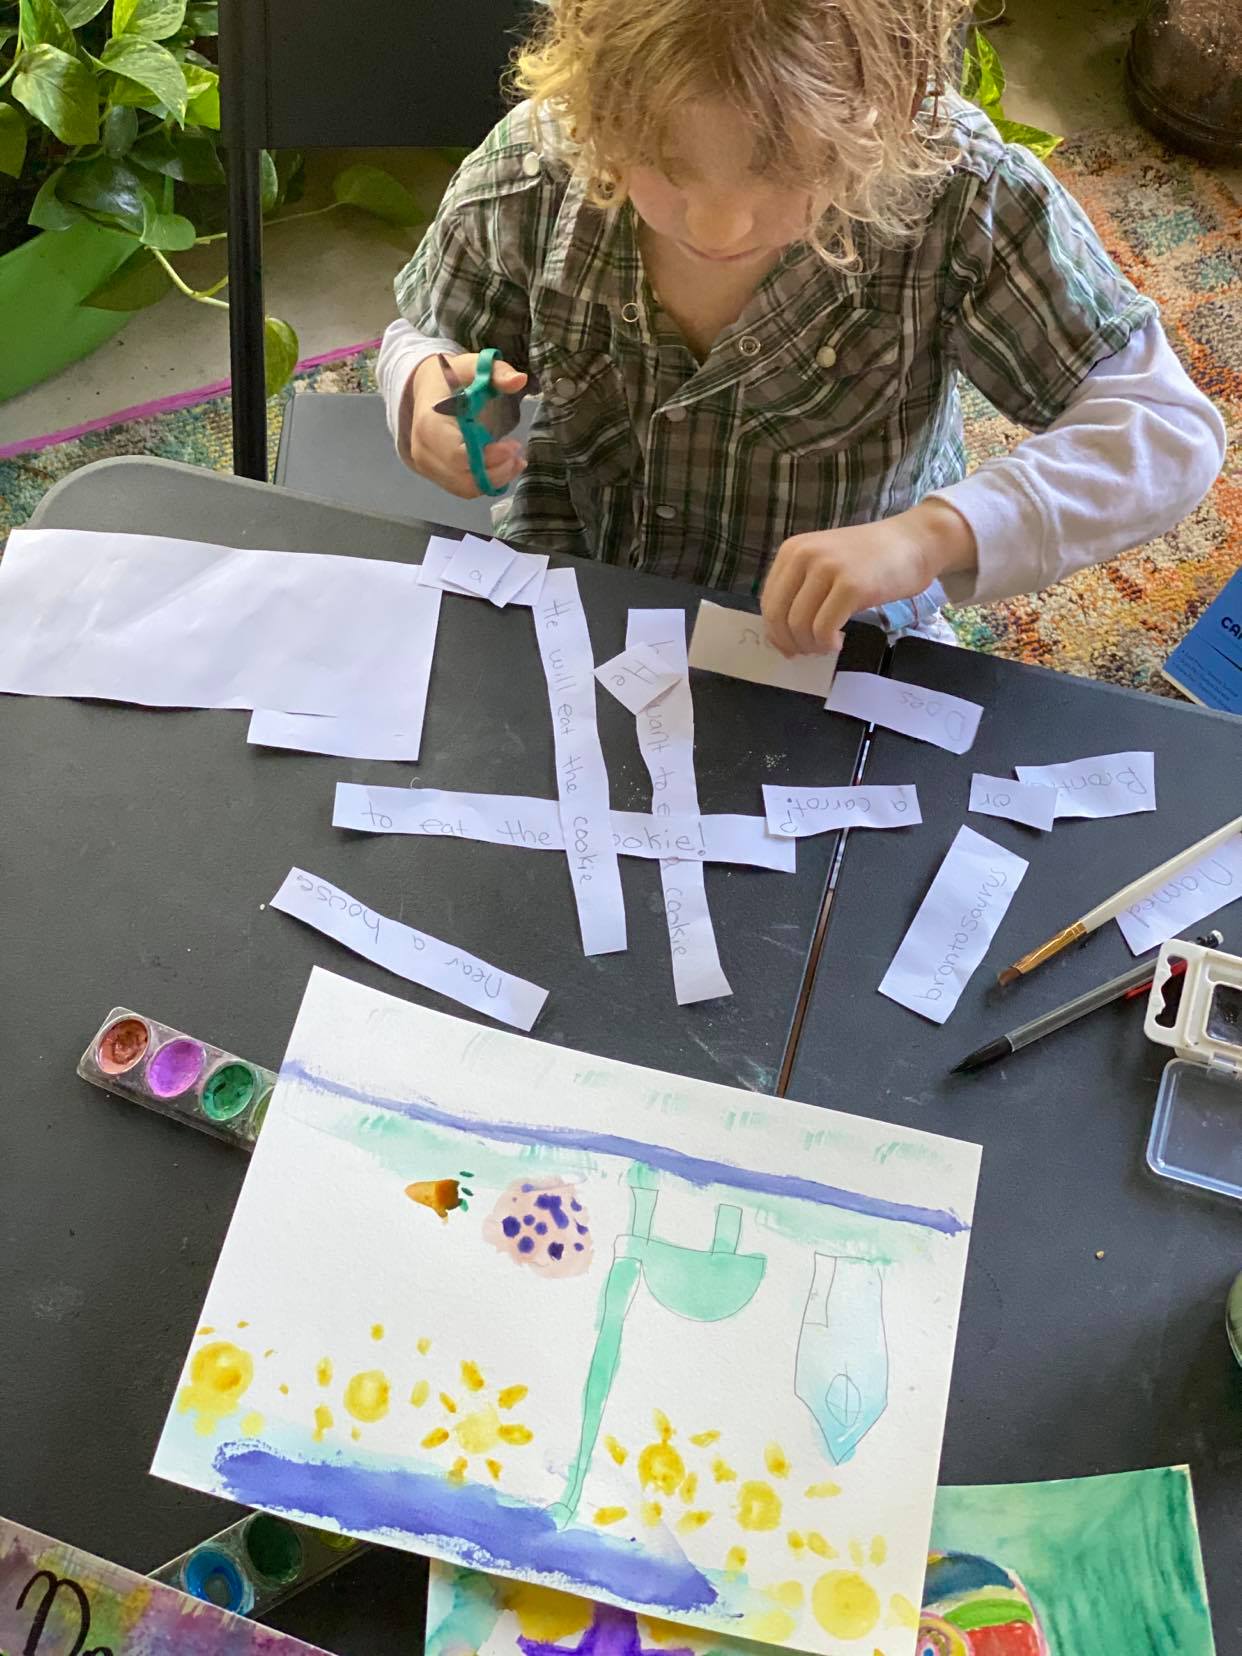
Step 3. We have them cut their sentence up into its individual words, scramble them up, then reassemble the sentence. They do this a few times before they glue the reassembled sentence under their picture. Here they’re beginning to develop the multitude of strategies good readers use to translate print into meaning.
Children especially enjoy doing this, saying it’s like a puzzle. So we’re able to keep them at this very valuable Step 3 for awhile. Consider what we know about reading and why Step 3 is so valuable.
Here’s a picture of Ethan, who started Key Words in his kindergarten year. Three months later, he’s at Step 3. The image on the left is shows the two pages he’s been working on. They’ll make up one of the 5 stories in his newest book. This book is just one of the many pre-primers/basal readers he’ll make. (A child who starts Key Word at an earlier age will probably only dictate one sentence at Step 3.) Read more about him here.
Step 4. Here they copy their sentence directly onto their drawings. So they’re perfecting letter formation.
They’ve been helping you sound out their Key Words at every Step along the way, so they have a strong phonics foundation to draw upon for spelling. And they now have a sizable collection of sight words they know from memory.
Step 5. The child is now writing on their own. Here, you only write their Key Word for them. Then with their new Key Word in hand, they leave you to 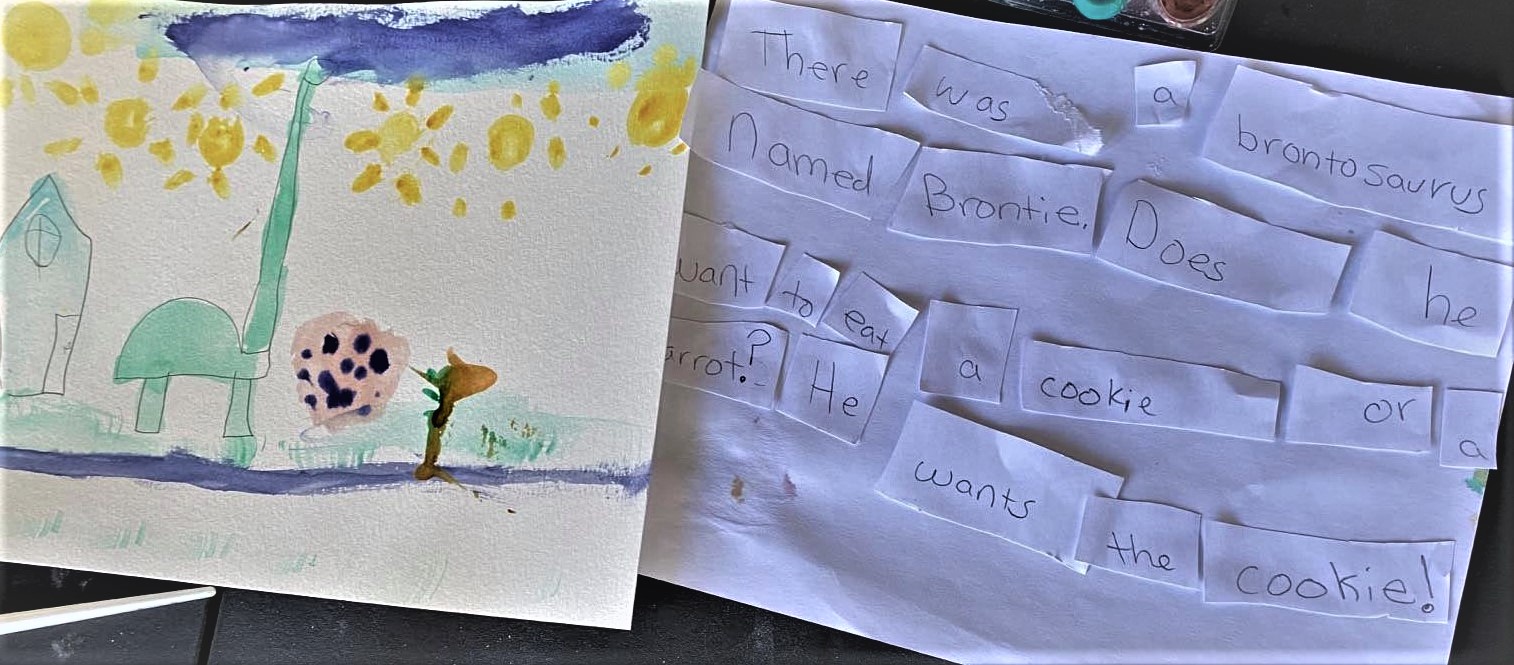 write their own sentence. You’ll find a link to Phonics, below, which describes how we support them as they do that.
Recall that all along, the child is producing books, each with 5 stories and that these books serve as their own, personalized pre-primers. Here are the two pages Ethan created (above) in his own pre-primer. See more about this here.
Step 6. The child is ready for “real life” projects, and for moving into professionally printed books.
What About Phonics?
If you plan to be sending your child back to in-person school as soon as it’s safe, then you don’t need to do more than integrate phonics into giving Key Words, as described above. But if you’re planning to continue with homeschooling and want a more thorough treatment of phonics, see See Phonics With Key Words.
However, if you’re working with a very young child who knows little of print, it would be helpful to have separate sessions to play with phonemic awareness — as described on that phonics page. Whatever you decide, please avoid activities that separate phonics out of the act of writing. It’s not necessary to have your child memorize the sound/symbol relationships. And it’s not the way the child best learns how to use phonics.
Here’s an overview of the series of Steps a child goes through — over time:
You have the set of criteria, mentioned above, and other resources you can use to help decide when to move a child forward in The Steps. See Making The Steps Failsafe.
With “a natural approach,” The Child Masters Two Skills — not just one:
Join “Helping ALL Kids Write To Read” on Facebook to comment or ask questions.